Showing posts with label recipe. Show all posts

Monday, September 21, 2009

Gordon Ramsay's Escalopes of Chicken

For those of you who pay attention, this was originally posted on ShowMyFace on July 21. But I've made it several times since then, including last night, and it seemed worth reposting to this site.

On Friday, I took a mental health day from work. It was kinda necessary and I made great use of it but doing a lot of nothing.

Part of the nothing involved watching a couple of shows on the DVR. That is when I saw this:


If you can't watch the YouTube video because your employer makes you ask permission to pee blocks YT or if you choose to be disagreeable by not watching it because you want me to punch you in the face, here's what you're missing: Gordon Ramsay making an absolutely mouth-watering chicken dish complete with basil, tomato and fresh mozzarella.

Now, basil, tomato and fresh mozzarella are one of my favorite flavor combinations. Joe's also a fan so when I showed him the video, he agreed - we must make this!

Sunday night was the night. The video gave enough information that I could make it straight from that but I managed to find the exact recipe online. After a bit of translating (the only important bit is that 200°C is roughly 400°F), we were underway. I made sure to swear adequately at Joe while I was cooking - I don't think Gordon Ramsay recipes work any other way.

It was a quick dish, a simple dish, and an amazing dish. The only thing we did differently is that I used fresh basil from our garden even where the recipe called for dried and I used about half a cup of dry white wine when we were cooking up the tomato/sauce mixture. Oh, and I skipped his sides. Because it's my kitchen, you $%^@ing donut, and I wanted too!

The results? See for yourself:


Beautiful and delicious. Even Joe agreed that it was worth being called a stupid donkey if it meant he could eat this for dinner!

Now, $%@& off, all of ya!

Programming Note: Gordon's back on tv starting tonight - it's a new season of Hell's Kitchen. I'll be there!

Saturday, August 22, 2009

Amish Friendship Bread

A couple of weeks ago we were visiting with a friend and his family for the evening. When it came time for dessert, I not only received a sweet treat but a total blast from the past - Amish Friendship Bread. She served us up a nice warm helping and also sent me home with a starter so I could make my own. When I mentioned this to a pal from Texas, she had never heard of it so I thought it might be worth sharing.

Here are the instructions/recipe:
Amish Friendship Bread

This is more than a recipe - it's a way of thinking. In our hi-tech world almost everything comes prepackaged and designed for instant gratification. So where does a recipe that takes ten days to make fit in? Maybe it's a touchstone to our past - to those days not so very long ago when everything we did took time and where a bread that took 10 days to make was not as extraordinary as it seems today.

The recipe comes to us from Mrs. Norma Condon of Los Angeles. Amish Friendship Bread is a great bread for the holidays. When you've made your bread, you can give your friends a sample and the starter that made it! Then your friends can make their own and pass it along to their friends. This is why the bread is called "friendship bread". It makes a great homemade birthday and Christmas present. Church groups and hospitals have spread a lot of love and cheer by making Amish Friendship Bread for their members. Many people make it regularly just because it tastes so good!

Amish Friendship Bread is a genuine starter bread. If you know someone with a starter, you are in luck. For those of you without access to a starter, we've done our research and found a great option. It's a special starter in powder form that can be activated with flour and water; it's safe, very inexpensive and we can send it to you. Starter for Amish Friendship Bread (G-110)

The Recipe

Important Note: Don't use metal spoons or equipment. Do not refrigerate. Use only glazed ceramic or plastic bowls or containers.

Required Main Ingredient
1 cup live yeast starter (see above)

day 1:
Do nothing with the starter.

days 2-5:
Stir with a wooden spoon.

day 6:
Add 1 cup flour, 1 cup sugar, and 1 cup milk. Stir with a wooden spoon.

days 7-9:
Stir with a wooden spoon.

Day 10:
Add 1 cup flour, 1 cup sugar and 1 cup milk. Stir. Take out 3 cups and place 1 cup each into three separate plastic containers. Give one cup and a copy of this recipe to three friends. To the balance (a little over one cup) of the batter, add the following ingredients and mix well.

1 cup oil
1/2 cup milk
3 eggs
1 tsp vanilla

In a separate bowl combine the following dry ingredients and mix well:

2 cups flour
1 cup sugar
1-1/2 tsp baking powder
2 tsp cinnamon
1/2 tsp baking soda
1 - (5.1 oz) box instant vanilla pudding
1/2 tsp salt )
1 cup nuts (optional)

Add dry ingredients to wet ingredients. Mix and pour into two well-greased and cinnamon sugared bread pans. Bake at 325 degrees for 1 hour.
When I made mine, I just poured everything into a traditional-sized glass cake pan to bake. After an hour I turned the oven off and left the cake to finish baking in the ambient heat.

Also, the friend who gave me the starter told me she routinely freezes her starter so she always has some. I now have three plastic baggies of starter in the freezer just waiting to thaw on day 0 and then start at day 1 again.

Part of me does wonder how all that milk sitting out at room temperature doesn't develop some kind of mad cow disease or bovine flu and kill us all but I guess years and years of history can't be wrong, right? Just ask the Native Americans!

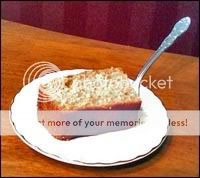
I know the photo isn't great and makes the bread appear dry - however it's very moist. I'd say it's really a misnomer to call it a bread because it's really much more of a cake consistency.

We've enjoyed this both with a bit of vanilla ice cream in the evening or in the morning with some butter alongside our coffee. The sweet cinnamon flavor works well in both situations.

I grew up in Upstate New York - not that far from the Pennsylvania Dutch Country so I'm fairly familiar with the culture and some of their crafts/yummies. I'm interested in hearing if you've heard of this before, as well as a bit of geographical information.

Monday, May 11, 2009

Sweet Strawberry Bruschetta

This weekend, I enjoyed a lovely lunch while visiting a winery. Even though I had ordered bruschetta from room service at the hotel the night before, Joe decided he wanted to try the cafe's "sweet bruschetta" as an appetizer. So glad we did! And since it was so delicious (and so simple!) I did my best to recreate it at home last night.

I started by toasting thin slices of a French baguette. I only left them in long enough to be just crunchy on the outside but still soft inside.

Next, I applied a generous amount of spreadable goat cheese. I topped this with a few bacon bits and some thinly sliced strawberries.

To finish it off, I drizzled with a bit of honey and some balsamic vinegar.

The result was very good. Next time, I'll reduce the balsamic to make more of a glaze - the taste was close but the consistency should've been more syrupy. The only other difference I really noticed between my version and the one served at the winery was the quality of ingredients. Joe bought the only kind of spreadable goat cheese available at the grocery store (I'm sure we can find better if we make an effort) and our waiter actually stated that they made theirs fresh from goats on the farm. And in order to avoid cooking a lot of bacon, I used the real bacon bits sold with the salad toppers. I'm sure their balsamic was higher quality as well.

But it was still a very tasty reproduction. With a little tweaking, we will make it again!

Friday, March 27, 2009

Fix-It-Fridays: Spice Up My Burger!

I'm feeling optimistic today so I'm going to say that grilling season is just around the corner. I'm fortunate enough to live in a location where we can use our grill almost year-round, which is awesome. But there's still something about warmer temperatures that makes the season feel new.

Today's "Fix-It" is burgers. What do you add to burgers to make them more exciting? Is it something you add to the meat before you cook it? Is it how you dress the cooked burger before serving it? Maybe it's even the meat itself.

Last night, I tried a recipe for Tex-Mex Burgers with Cajun Mayo with the following variations:

  • We were running low on Cajun seasoning so I added a bit of cayenne pepper to the burger mix and served with plain mayo
  • I used some leftover scallions instead of white onion
  • I used Jarlsburg cheese due to availability
  • No lettuce, tomato, or buns
I assembled the raw burgers and Joe grilled them up. Next time, I'll make sure we have more Cajun seasoning (I used ours up on the sweet potato fries) and the pepperjack cheese would've been awesome.

These were delicious but now I've created a monster. Joe has declared he will never eat "plain" burgers again. Yeah, wishful thinking.

So, fix it! Share your ideas for sprucing up a regular burger in the comments. Burgers are such a summer staple, I bet there are a lot of great ideas out there.